Safety Precautions Before You Start
When dealing with how to uninstall a dishwasher, safety must come first. Before you dive into the process, it’s crucial to take some safety precautions. This ensures that you avoid any unnecessary risks such as electrical shocks or water damage. Let’s get started on making your kitchen a safe work environment.
Shut Off Electricity and Water Supply
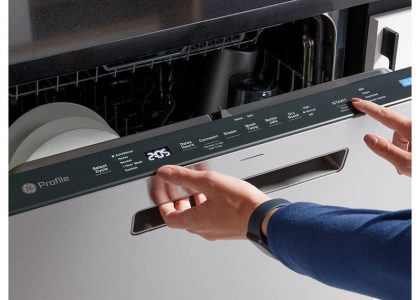
How to uninstall a dishwasher? Before touching any part of the dishwasher, you must shut off the electricity and water supply. Look for the circuit breaker that controls the dishwasher and switch it off. For the water supply, there’s usually a valve under the sink or near the dishwasher. Turn it clockwise to close it. This step is non-negotiable to prevent any accidents involving water and electricity.
Test to Ensure Utilities Are Disconnected
After you have shut off the utilities, it’s not enough to assume they’re safely disconnected. Test to make sure. For the electricity, you can use a non-contact voltage tester near the dishwasher’s wires. If the light stays off, there’s no power. For the water, try to run the dishwasher or check the valve for any leakage. No water should come out if it’s properly shut off. Only proceed when you’re certain that both the electricity and water supply are disconnected.

Tools and Materials Needed for Dishwasher Uninstallation
How to uninstall a dishwasher? Before you start the process of how to uninstall a dishwasher, gather the necessary tools and materials. Doing so will make your job easier and help prevent any delays. Here’s what you’ll typically need:
- Screwdriver: You will need a screwdriver to remove screws from the dishwasher panel and brackets.
- Wrench: An adjustable wrench will help you loosen and detach the water line and drain hose.
- Pliers: These may be necessary to remove clamps or tighten caps.
- Bucket or Towel: Have a bucket or towel on hand to catch any water that may spill when disconnecting the water line.
- Non-contact voltage tester: This handy tool was mentioned earlier and is crucial for ensuring the power supply is disconnected.
- Tape: Electrical tape is necessary to secure any loose wires after disconnecting power.
- Work gloves: Protect your hands with gloves while working with tools and handling the dishwasher.
- Flashlight: Use a flashlight to illuminate dark spaces behind or under the dishwasher.
Make sure all your tools and materials are within reach before you begin. This way, you’re not searching for tools mid-project. Safety glasses can also provide an extra layer of protection, especially when working under the kitchen counter. Be prepared, and your uninstallation process will go smoothly.
Disconnecting the Dishwasher
Once you have ensured safety and collected all the tools and materials needed, the next step in how to uninstall a dishwasher is to disconnect it. This part of the process is critical and requires precision and attention to detail. You’ll be dealing with water lines and ensuring that no spillage occurs during the process.
Detach the Water Line and Drain Hose
To start, locate the water line that connects to the dishwasher. Using your adjustable wrench, carefully loosen the nut that secures the water line to the dishwasher. Keep a bucket or towel ready to catch any water that may escape as you disconnect the line. Next, find the drain hose. This is usually attached to the dishwasher with clamps. Use your pliers to remove these clamps and then gently detach the hose from the dishwasher. Make sure you direct the end of the drain hose into the bucket to catch any residual water.
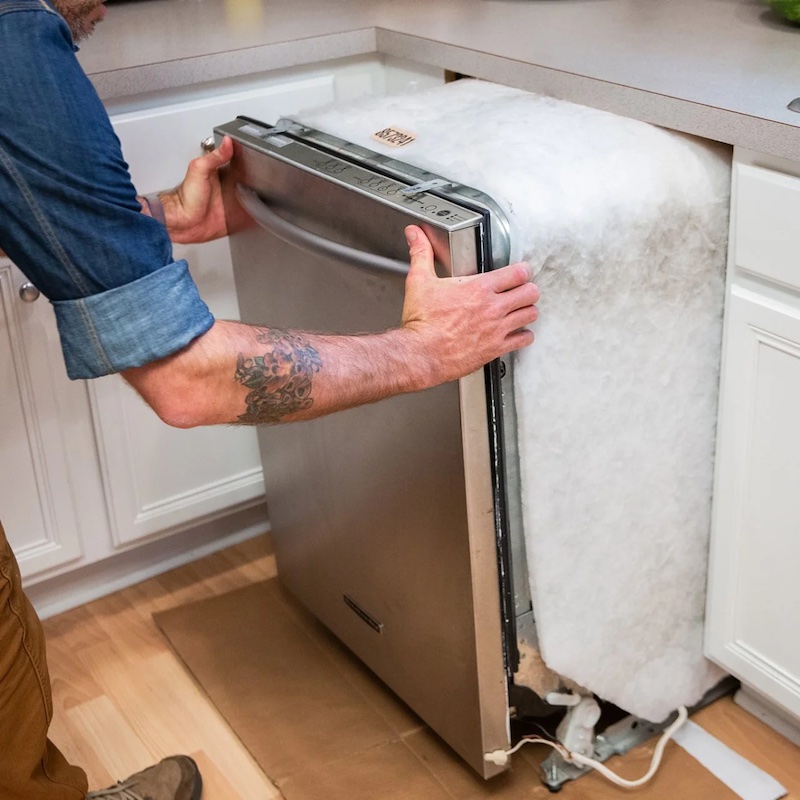
Remove the Dishwasher from the Cabinet Space
After detaching the water line and drain hose, you’ll need to remove the screws that hold the dishwasher in place. These screws are typically located on the brackets at the top of the dishwasher. Use your screwdriver to carefully remove them. Once the screws are out, you can start to gently slide the dishwasher out from its cabinet space. Be mindful of the power supply and ensure that it’s still disconnected as you move the appliance. Ease the dishwasher out slowly to avoid damaging the surrounding cabinetry or flooring.
Handling Electrical Connections Safely
After removing the dishwasher from its cabinet space, the next crucial step is to handle the electrical connections safely. This ensures that all live wires are dealt with properly and reduces the risk of electrical hazards. Here’s how to manage the dishwasher’s electrical connections with care:
Disconnect the Power Supply
First, locate the electrical junction box on the dishwasher. It’s usually found near the base, at the front, to the back. Using your screwdriver, unscrew the cover to access the wires. You should see wire nuts that connect the dishwasher’s wires to the house wiring. Before touching them, double-check with your non-contact voltage tester to ensure there’s no electricity flowing. Once you confirm it’s safe, unscrew the wire nuts and disconnect the wires.
Secure and Cap the Wiring
After you’ve disconnected the wires, it’s important to secure them to prevent any potential safety issues. Twist electrical caps onto the house wiring to safely cover the exposed ends. For added security, wrap the capped connections with electrical tape. This prevents the caps from coming loose over time. Once you’ve capped the wires, gently push them back into the junction box and replace the cover. You have now safely handled the electrical connections and are ready to proceed with the removal of your dishwasher.
Preparing the Dishwasher for Removal
Before you can remove the dishwasher, you need to prepare for its safe removal. How to uninstall a dishwasher? Ensuring the path is clear and the floor is protected will help avoid accidents or damage.
Clear the Pathway for Safe Removal
Begin by clearing a path from the dishwasher to the exit point. Remove any kitchen mats, chairs, or movable items that might trip you. Make sure the path is wide enough for the dishwasher to pass through easily. If doors are too narrow, remove them from the hinges temporarily.
Protect the Floor and Appliance
Next, lay down protective material on your floor. This could be cardboard or a drop cloth. It will help prevent scratches and scuffs as you slide the dishwasher out. For extra safety, wrap the corners of the dishwasher with towels. This protects both the appliance and your cabinetry from bumps during removal.
Dishwasher Removal Steps
Once you have handled the electrical connections and prepared the area, you’re ready for the actual removal steps. This phase requires patience and a careful touch to avoid any damage to your kitchen space.
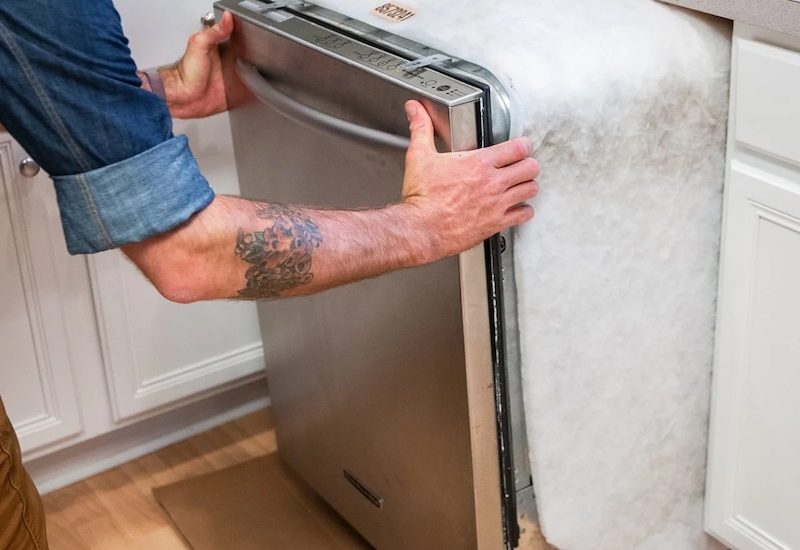
Carefully Slide the Dishwasher Out
Grip the dishwasher firmly by the sides or using the handles if available. Gently slide the appliance forward, away from its cabinet space. Keep the movement steady and slow to control the unit and minimize any risk of scraping the floor or walls. If you encounter resistance, check for any missed connections or screws still in place.
Transporting the Dishwasher
With the dishwasher free from its place, it’s time to move it out of the kitchen. If you have a dolly, carefully place the dishwasher onto it for easier transportation. Make sure to secure the dishwasher on the dolly to prevent it from shifting or falling. Walk it slowly through the cleared pathway and out of your home. Avoid sharp turns and go over any thresholds with caution to keep the dishwasher stable.
When reaching the transportation vehicle, like a truck or van, lift the dishwasher with care. It’s best to have someone help you with this step to distribute the weight evenly. Place the dishwasher inside the vehicle and make sure it’s not at an angle where it might tip over during transit. If necessary, use straps or ropes to secure the dishwasher in place, ensuring it won’t move around while you’re driving.
Post-Uninstallation Cleanup
After successfully uninstalling the dishwasher, your focus should shift to the cleanup process. It’s essential to address any potential water damage or leaks immediately to prevent long-term issues. You’ll also need to prep the area if you’re planning to install a new appliance or turn the space into additional cabinetry. Here’s how to wrap up your uninstallation project:
Checking for Water Damage or Leaks
Inspect the area around the dishwasher’s former location for signs of water damage. Look for wet spots on the cabinets, flooring, or walls. If you detect moisture, dry it thoroughly with towels or a fan. Check also for any leaks from pipes that could cause future problems. Address these issues promptly to avoid mold or structural damage.
Preparing the Space for a New Appliance or Cabinet
Start by cleaning the vacant space. Wipe down the interior of the cabinet and vacuum any debris from the floor. If you’re planning to install a new dishwasher, ensure the area is ready and all connections are intact. For those converting the space for storage, you might consider adding shelving or a new cabinet door. Make sure the space looks neat and is functional for its new purpose before moving on to the next project or appliance installation.
Installing a New Dishwasher (Optional)
If you’re planning to replace your old dishwasher with a new one, installation is the next step. With your space cleaned and prepped, you’re ready to proceed. Here are short, straightforward steps to install a new dishwasher effectively:
Steps to Install If Opting for Replacement
- Check the Fit: Ensure that the new appliance fits snugly into the space left by the old one. Measure the dimensions before you begin.
- Connect the Drain Hose: Attach the new drain hose to the dishwasher, securing it with clamps. Then, run the other end to the sink drain or garbage disposal.
- Attach the Water Supply: Use the wrench to connect the water supply line to the dishwasher. Tighten it to prevent leaks but do not over-tighten.
- Link the Power Supply: Connect the dishwasher’s wires to your home’s electrical system. Remember, safety first – ensure the circuit breaker is still off.
- Mount the Dishwasher: Slide the dishwasher into the space. Adjust until it is level. Secure it to the cabinetry with screws.
- Check All Connections: Once installed, double-check all connections. Look for any potential leaks at the water supply line.
- Test the Dishwasher: Restore power at the circuit breaker and turn on the water supply. Run a test cycle to ensure everything works correctly.
- Final Inspection: After the test cycle, inspect for leaks or issues. If everything is secure, your new dishwasher installation is complete.
How to uninstall a dishwasher? Be patient, and follow these steps carefully to ensure your new dishwasher is installed properly and safely. Remember to use your tools and materials wisely, and keep safety precautions in mind throughout the installation process. Good luck with your new kitchen addition!